Wednesday, 27 November 2013

Using Haiku Deck To Teach Each Other About Pioneers

With a partner or a small group, students chose a topic about what life was like for pioneers making their way to Canada. Students used the research in the classroom to help look for important ideas. They recorded the main points as jot notes onto paper.

They then used an organizer to come up with two statements (a title and a subtitle), that could summarize each important idea. They could create as many of these as they felt necessary.

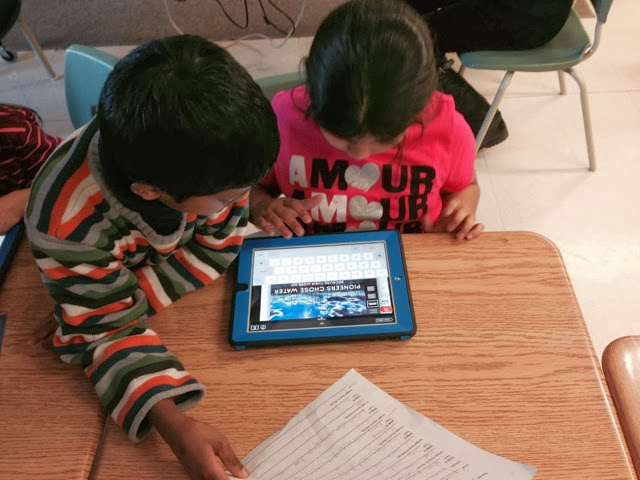
Students then, searched the internal web of Haiku Deck, using search words related to their topics in order to come up with relavant pictures to match their slides.  They assembled their slideshows on Haiku Deck with ease.

Haiku Deck is a free app, that allows students to summarize their thinking and make simple presentations using beautiful royalty free images. It's a great presentation tool, that is extremely easy to use, and introduces students to creating 'to-the-point' presentations.


Students then practised presenting their information, making sure to expand on the information in the slide, and to not just read what's on the screen (a pet peeve of mine during presentations).


After many rehearsals, students presented their polished Haiku Deck's to the class.


Piet Mondrian and Keith Haring Mashup

I have been terrible about keeping up with my blog! The Tigers of room 204 have still been creating amazing things! I hope to get caught up with all the wonderful doings by these amazing third graders!

I was inspired by Pinterest, a favourite place to scour for new and interesting activities! In this art lesson we created mash-ups, combining the works of Keith Haring and Piet Mondrian.

We were exploring artists who expored with line and colour. We looked at the lines and colours of Piet Mondrian, and the expression in Keith Haring's work. Students manipulated pre-cut strips of black paper (I recommend pre-cut strips for grade 3 and under). They created squares and rectangles using the strips. They had to make descisons about where to cut and how to line up their shapes. They used rulers to help them keep their lines level.


Students were then encouraged to only use primary colours, in the style of Piet Mondrian. They could use crayon, chalk or oil pastel, pencil crayon or marker.


Then we looked at Keith Haring's work, and learned about action and movement. Students created their people, coloured, cut and added them to their 'Mondrian'. 

They then added lines to show movement and direction.


Tuesday, 12 November 2013

Student Led Conferences and QR Codes

It was great to see my students take the lead and guide their parents through student conferences. We thought it would be fun to liven the conference up a little and add some tech to our classroom tour. Students wrote speeches, sharing what they had learned about a particular topic, or explained an activity in our classroom.

We recorded their voices using Audioboo, an app that allows us to share a link to our voice recording. We then used QRstuff to change the link into a QR code. We printed the codes and hung them around the room. Anyone with a device could scan the codes that link to students voices. We used Quick Scan on our ipads to scan the codes.

I added the links to the pictures.

Welcome to Our Classroom


Comparing Homes


Alien Recounts


Warm and Cool Colours


Aboriginal Dot Paintings


The Villages

Aboriginal Dot Art

To enhance our studies of Early Settlers, we thought it would be fun to study the art of different groups of Aboriginals. For these dot paintings, students chose a symbolic animal -one with which they related or shared similar traits. We researched animal symbolism to help inspire us.

Students made a stencil, and coloured it in using black paint. They then created a design or pattern using only dots. These dots were made easier by the use of a Q-tips! The results were pretty amazing.


Making Clay Float!


The tigers have been eagerly exploring forces. During this lab, we were trying to understand buoyancy and balanced forces. Students were given a piece of tinfoil and were asked to make it float, and carry a load.


We learned that keeping the structure balanced was key. We also learned that it was important to have edges.


We then had to take a piece of clay that does not float, and make it float!


This proved to be very challenging.

Real scientists record their observations!


Exploring First Nations Settlements in Ontario

We have been learning about the First Nations people living in Canada in the late 1700's. We looked at maps of Canada and talked about how Canada has changed over the past 200 years. We looked at Ontario, and found Brampton on the map. We learned that the Wendat people were living in Southern Ontario at that time. Students explored the challenges facing people living off of the land and did some comparisons to life today. We compared our home to the longhouses of the Wendat people.


As we explored Ontario in the north, we learned about the Anishinabe who lived near Algonquin. We researched their way of living and added Wigwams to our homes posters.


By creating villages, we were able to see first hand the similarities and differences between the two First Nations communities and our own. 

Saturday, 26 October 2013

Exploring Forces

It's been a busy week and these Wild Tigers have been busy scientists. We began our forces unit by exploring what pushes and pulls are. We explored how things move by either being pushed or pulled, and that more force is needed to push and pull an object that is heavy. Students brainstormed and acted out how they would move a heavy object like a car, by pushing with a large group, pulling and pushing with a large group, or my personal favourite, by calling a tow truck.

We then looked at pictures of familiar actions/objects and decided whether or not the object was being pushed or pulled. Some of the actions included water skiing, throwing a football, raking, mowing the lawn, bowling, flying a kite, skating etc. We sorted by push and pull.

Then we explored science centres.

Centre 1: Will It Bend?

In this centre, students inspected a variety of objects and determined whether or not they thought they could bend them. They recorded their observations, then experimented by attempting to bend the objects.


Centre 2: Will It Float?

In this centre students made predictions about which objects would sink and which would float. After recording their predictions, they conducted the experiment by dropping the objects into a bucket of water. Students recorded the results. They talked about the invisible force of buoyancy that was pushing on the objects that floated.


Centre 3: Using Pushes and Pulls

In this centre, students used pushes and pulls to create a plasticine snail. Students learned that they could manipulate a material and change it's shape by using muscular force and a combination of pushing and pulling.


Centre 4: Magnetism

In this centre, students learned that some forces can push and pull such as the forces conducted by magnets. Students learned that magnets have north and south poles, and experimented with pushing the north and south poles together. Students experimented with magnets that attracted and magnets that repelled, and learned how an invisible force can make objects move.


Next week we will explore balanced forces and buoyancy, gravity and friction!